If you’re reading this, it means you are super close to seeing your final images! Yay! I can’t wait to show you the full gallery. I hope you see the images and fall in love with yourself over and over again!
Please read all the way to the bottom, and bookmark this page for future reference. We’ll talk about a lot of things during your reveal, so if you’ve forgotten something, this will be an easy resource to come back to!
- If you are meeting me at the home studio for your reveal, my address is 3127 W 28th Ave Unit 4 Denver, CO 80211.
- If you are meeting with me virtually, please make sure you’ve tested your connection on Google Meet to make sure everything is ready to go. A laptop, desktop computer or large tablet will work great for your reveal; cell phones aren’t recommended as the viewing screen won’t be large enough to see your photos properly.
When you get Google Meet up and running, please make sure your camera is on and that your microphone is not on mute. Because it is only two of us on the call, please have your camera working. I won’t mind if you’re not 100% done up; you can be in your PJs, coming home from the gym, or without any makeup. I’ll probably fall in one (if not all) of those categories myself!
I will wait 10 minutes for you to join our call past our scheduled start time, but will need to reschedule your meeting if you will be more than 10 minutes late for our call. I totally get it — life happens, things change throughout your day! Just let me know as far in advance as possible if you need to reschedule.
Lastly, I will send you the direct Google Meet link one day before our scheduled meeting time. That will take you directly to our meeting room when your reveal session is scheduled to start.
Now let’s talk about retouching
Every image you take home includes retouching at no additional cost, whether it’s natural or like what you see in advertisements. That choice is up to you! Read on for more info about what retouching is exactly.
When you think of retouching, your mind might automatically visualize what you see in magazines. Super smooth skin. Not a visible pore in sight. Teeth so white they could blind you.
While that may be what Vogue does for their editorials, it’s not necessarily what I do to your boudoir photos. Retouching is not, “How can I make this photo 1,000,000% perfect?” It’s not about perfection. It’s not about altering your body in Photoshop.
It’s about enhancing the beauty that you already have. I want you to look at your photos and be able to easily recognize yourself in them.
 So let’s get down to business! We’re gonna work backwards — here’s what is not included in the retouching process:
- Body sculpting. “Can you take off ten pounds?” Girl, no. I’ll be real with you — you simply don’t need that. You are stunning just as you are!
- Tan line adjustment, blending, or removal. This is a duty for a professional retoucher. Maybe it’s just me, but I think tan lines are kinda hot! If you’d feel better without them in your photos, I can definitely outsource the images for an additional fee.
- Severe stray hair removal. I’ll remove these if there’s a couple obvious flyaway hairs on your eye, chin, cheek, etc. Other than that, this is boudoir, baby! Your hair is meant to be a little messy!
- Removal of stretch marks, cellulite, veins/blood vessels, peach fuzz anywhere on your body, or under-eye darkness. While I can’t remove these entirely, I’m happy to soften them when I do your skin smoothing. These are naturally occurring, totally normal fixtures to your body and that’s a-okay!
- Removal or adjustment of shadows and light. As you’ve seen in my portfolio, my work can be dramatic thanks to the strategic use of light and shadows. I try to give you a gallery full of a variety of lighting sources: direct sun, back light, soft diffused light, and everything else in between. For that reason, I cannot honor retouching requests that ask for the removal of shadows (like the little flower shadows that come through my curtains in the wintertime) or adjustment of shadows. This isn’t so much retouching as it is creative editing, which falls outside the scope of what’s included here.
- Fixing any ill-fitting wardrobe items. This falls under creative editing as well.
Now let’s discuss what is included in the retouching process:
- Removal of any temporary blemish. This can be a pesky pimple that popped up the morning of your shoot, a bruise from the gym, or a scrape from your cat. If it’s temporary, I’ll automatically take it out for you. If you have something of a more permanent nature that you’d like to remove (e.g. scars, tattoos, beauty marks, etc.), let me know and I will happily oblige to the best of my ability. I’ll never make any adjustments like this without your consent!
- Skin tone matching across your body. It’s highly likely we’ll photograph some areas of your body that don’t see much sun (*wink wink*), so it’s possible your skin tones will be lighter in some areas. This is totally normal and natural! I’ll do my best to match skin tones as needed and to the level of my ability.
- Skin smoothing to your liking. I want you to have as much creative control over the final images so it’s up to you how much skin smoothing (also known as “airbrushing”) you’d like. Skin smoothing can also be described as “skin softening.” Think of it like foundation you put on your skin: it will soften the texture of your skin, but not remove it completely. Skin texture will still show through, which is natural, normal, and totally okay! You have three levels to choose from here:
1. Natural
- Temporary blemish removal included
- No airbrushing or skin smoothing; all you, baby!
2. Photographer’s Choice
- Temporary blemish removal included
- Skin tone matching where appropriate, to the best of my ability
- Light to medium airbrushing on an as-needed basis, from photo to photo
- Fine lines, wrinkles, and pores will be softened an appropriate amount
- Skin texture will still come through in the final photos, though it will be muted a bit
3. Magazine
- Temporary blemish removal included
- Skin tone matching as needed, to the best of my ability
- Consistent, extensive airbrushing all over, on every image
- Buttery-smooth skin across all photos with very little visible skin texture (like what you see in advertisements)
- A note on this style of retouching: there is little wiggle room with skin smoothing like this, meaning there is a fine line between this style of airbrushing and looking plastic or unlike yourself. I only recommend doing one pass with this level of airbrushing. After one pass a lot of your skin texture has been diminished, so there won’t be much left for me to keep smoothing. Just a heads up as you make your choice!
To better illustrate these options, let’s look at some comparisons from this babe’s recent shoot in the home studio:
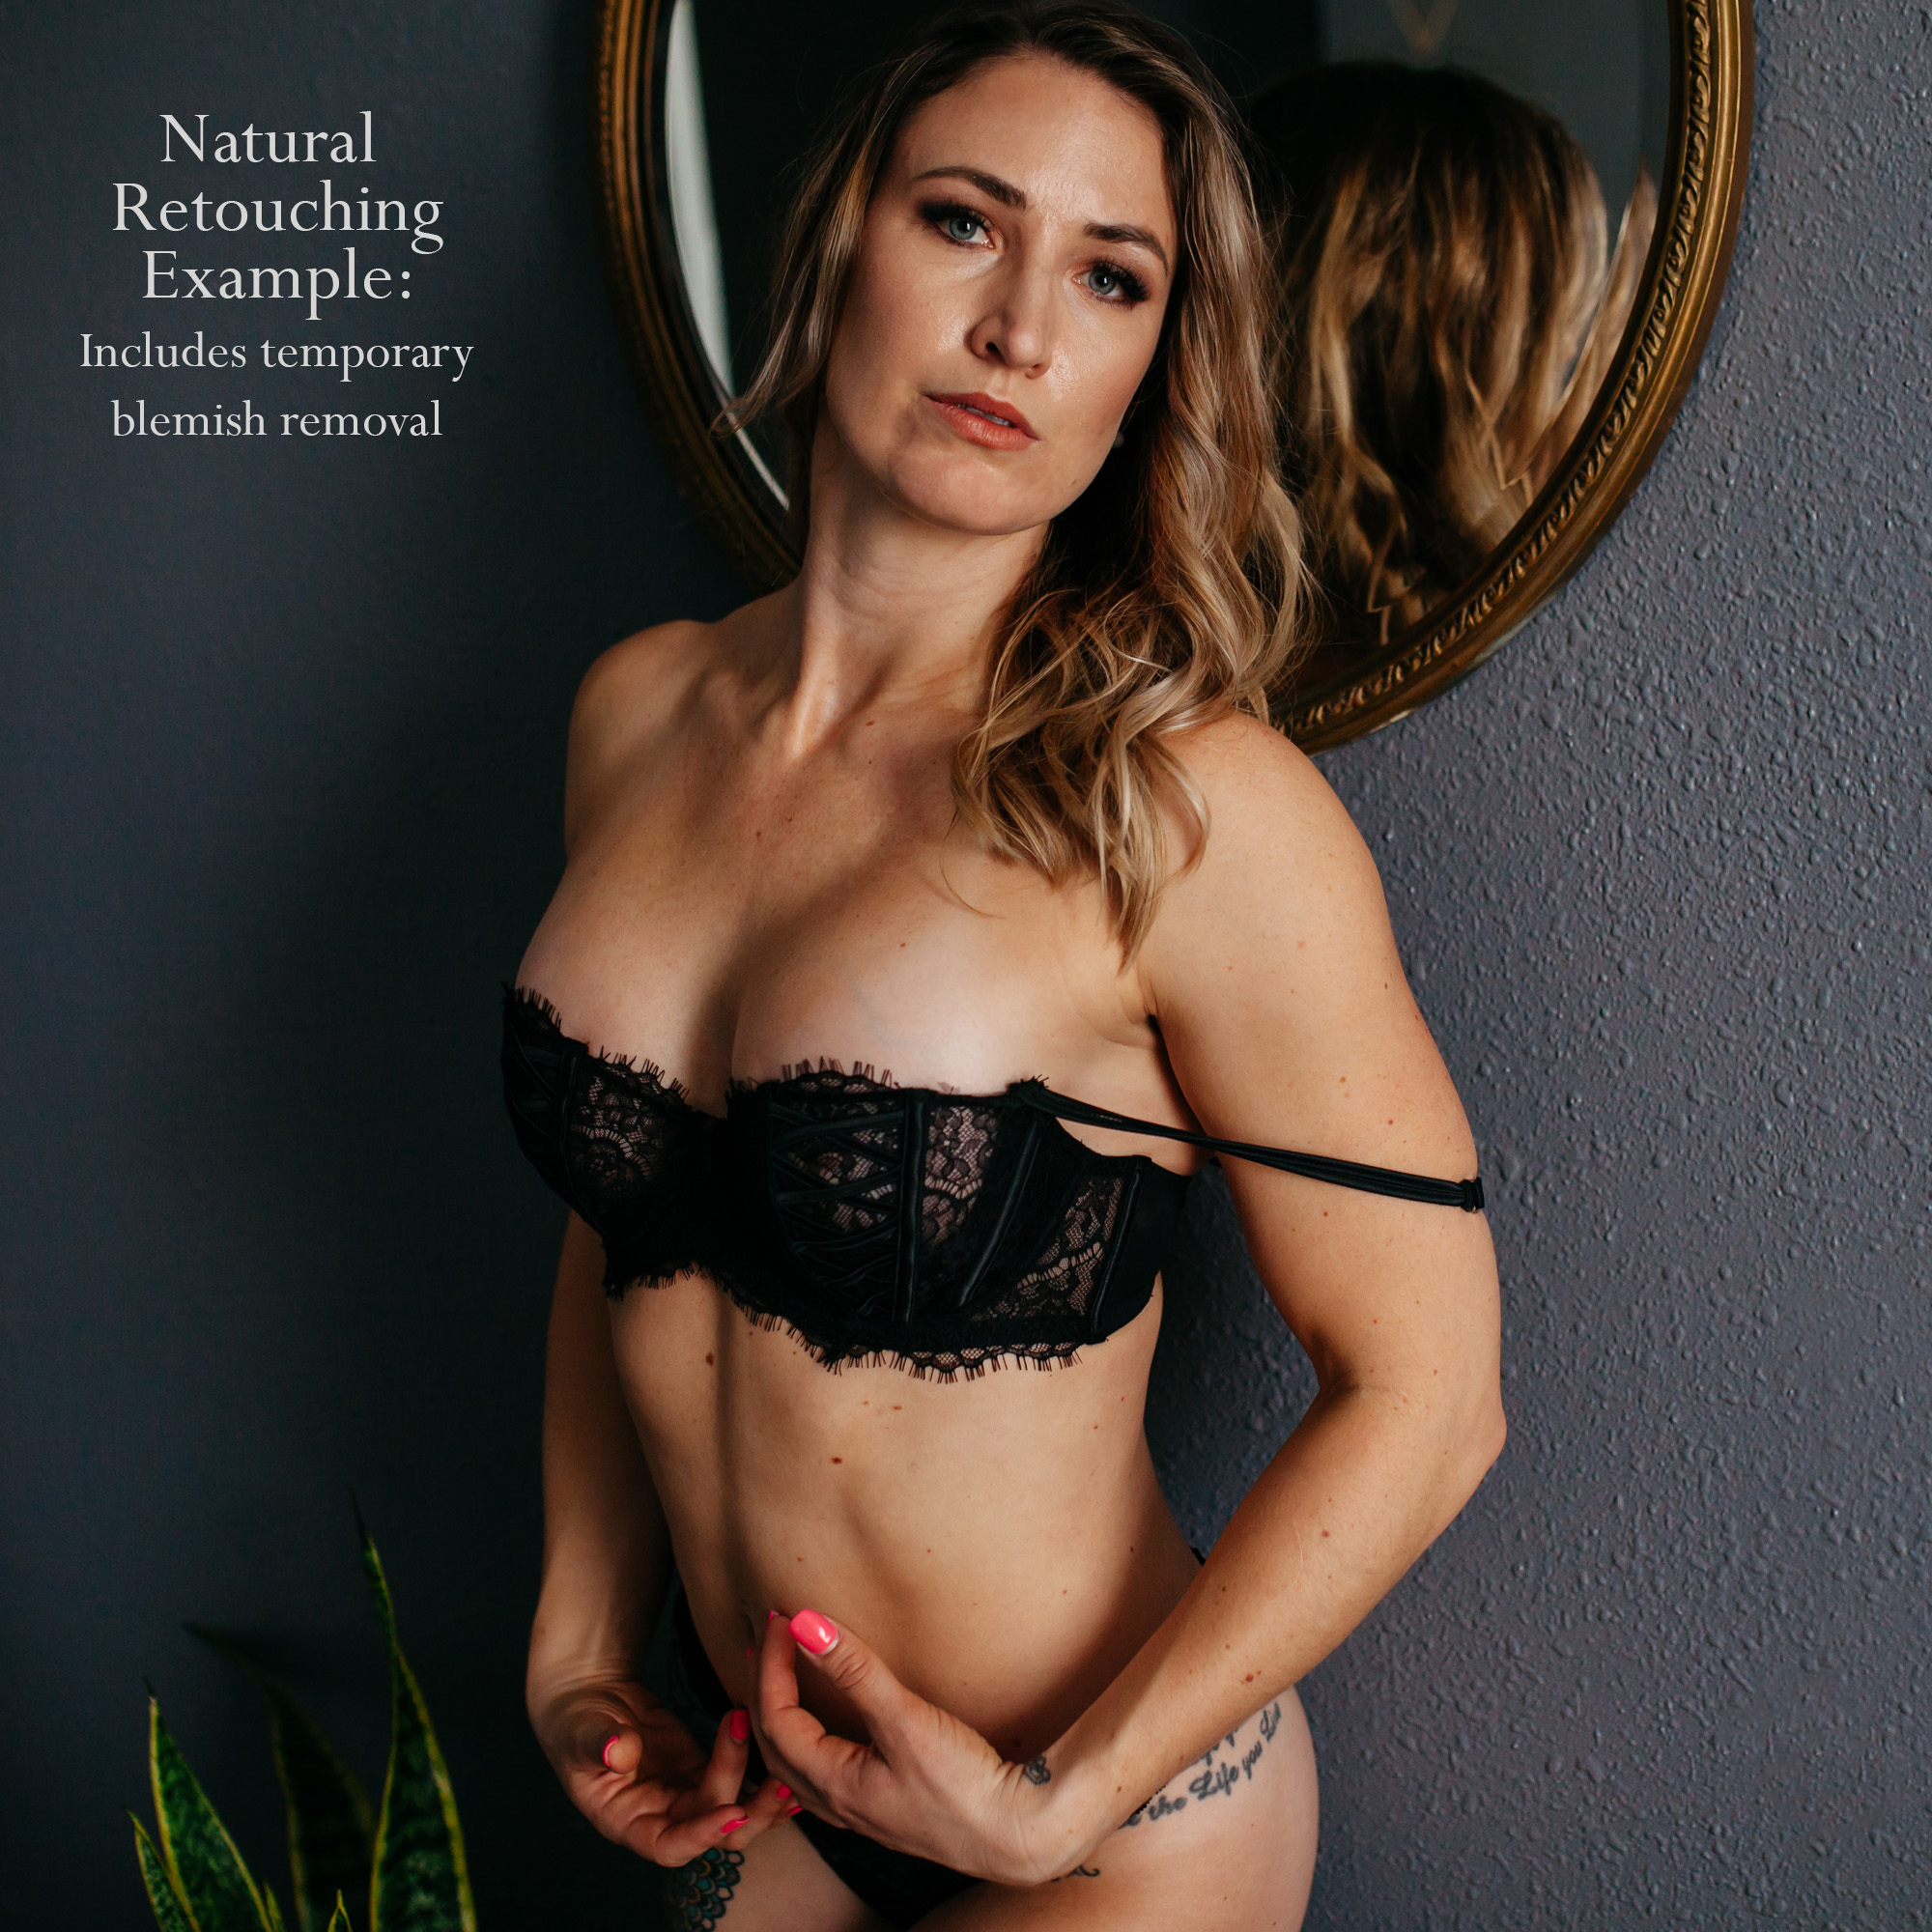

 While you are welcome to choose any option for your final images, my professional recommendation is that you choose either natural or photographer’s choice for skin smoothing, based on your comfort level. Skin texture is totally normal and natural. I want the photos to look like you in real life!
One more topic before you go. I’d like to break down what your reveal session will look like!
- We’ll go over your photos a few times. The first time I’ll show you your gallery just so you can take it all in and appreciate yourself for doing something as intimate as boudoir. The second time through we’ll mark your favorites. From there, we’ll refine your selections to only include the images that you love (or all of them, if you’re going for a package that includes all digital images like the Beauty or Luxe Collections!).
- If you’re making an album, we’ll design it together. That way, you can have as much creative control as possible as to where each photo goes in the layout. This is why in-person meetings are best for album design, as doing your design over a virtual call can be cumbersome and tedious.
- At the end, we’ll talk details. This can include: your preferred album cover color and texture, which glass box finish you’d like, your preferred retouching level, whether you’re comfortable with my sharing any of your images online, where the products will be shipped, and the timeline in which you need to have them in your hands.
- As a reminder, the default shipping option is home studio pickup. This is so I can get a set of eyes on your products ASAP to make sure there are no issues. This is complimentary to you.
- You are welcome to have the items shipped to you if that’s easier. If you would like to have your products shipped directly to you from the vendors I use, it will be $10 per product to ship via FedEx Ground or USPS First Class. If you’re on a tight schedule and need to upgrade the shipping speed, please let me know before we order your products. You have the option to upgrade to FedEx 2nd Day or Next Day, or USPS Priority Mail, depending on what you order. Market rates apply for 2nd Day and Next Day.
- Please make sure you are truly available to pick up your items from me if you select home studio pickup. Shipping the items to you after they’ve arrived at my home will incur an additional $50 fee. Because I am car-free, I cannot guarantee immediate shipping and handling of your products. As such, the quickest options for shipping will either be home studio pickup or directly from the vendor at the rates mentioned above. If an issue arises that precludes you from picking up at my home, please get in touch with me ASAP so we can work out the best way to get your products to you. You can always send a loved one to come grab your items too!
- After the meeting is over, I’ll send you an invoice. This will come from Square, one of my payment processors. Once this invoice is paid up, I’ll get working on retouching your images at the level selected above.
- Once retouching is complete, I’ll send over an online gallery. Once your images are spiffed up and ready to go, I’ll pop them in an online gallery and send you the login info over email. At this point, I’ll include info on the next steps of the retouching process.
So there you have it: Retouching 101! Please email over any questions you might have, and I’ll make sure to address them in a reply or during your virtual reveal session.
Can’t wait to see you soon!
-Ash

